
 by
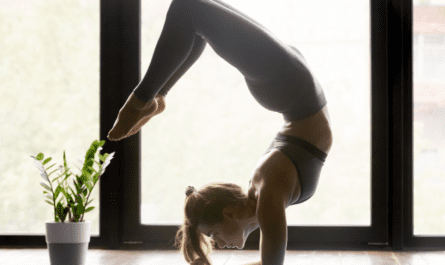
by Learning how to do a handstand for beginners can be challenging but achievable with consistent practice and proper technique. Here are some steps and tips to help you get started as a beginner:
1.Build Strength and Flexibility:
Building strength and flexibility is crucial for learning to do a handstand effectively and safely. Here are some specific exercises and stretches to focus on:
Strength Exercises:

- Core Exercises:
- Plank variations (standard plank, side plank, forearm plank)
- Hollow body holds: Lie on your back, engage your core, and lift your arms and legs off the ground while keeping your lower back pressed into the floor.
- Leg raises: Lie on your back and lift your legs towards the ceiling, keeping them straight.
- Shoulder and Arm Exercises:
- Push-ups: Practice both standard and variations like diamond push-ups (hands close together).
- Pike push-ups: From a downward dog position, lower your head towards the ground by bending your elbows.
- Wrist Strengthening:
- Wrist push-ups: Place your hands on the ground with fingers spread, and lean forward to put weight on your wrists, then push back up.
- Wrist curls: Hold a light weight (or use resistance bands) and perform wrist curls, moving your hand up and down.
- Leg and Hip Exercises:
- Squats: These strengthen your legs and core, helping with balance and stability.
- Lunges: Forward, reverse, and lateral lunges to improve leg strength and balance.
Flexibility Stretches:
- Wrist Stretches:
- Extend your arm straight in front of you, palm facing down. Use your other hand to gently pull back on your fingers.
- Rotate your wrists in circles both clockwise and counterclockwise.
- Shoulder and Upper Back Stretches:
- Shoulder circles: Rotate your shoulders backward and forward in large circles.
- Doorway stretch: Place your forearm against a door frame, and gently lean forward to stretch the chest and shoulders.
- Hip Flexor and Hamstring Stretches:
- Lunge stretches: Step one foot forward into a lunge position, keeping your back leg straight and pressing your hips forward.
- Forward folds: Stand with your feet hip-width apart and fold forward from your hips, reaching towards your toes or the ground.
- Core and Lower Back Stretches:
- Cobra stretch: Lie face down, hands under your shoulders, and push your chest up while keeping your hips on the ground.
- Cat-Cow stretch: On your hands and knees, alternate between arching your back up towards the ceiling (cat) and lowering it while lifting your head and tailbone (cow).
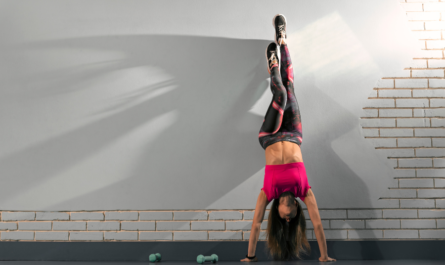
2.Wall Assisted Handstands:
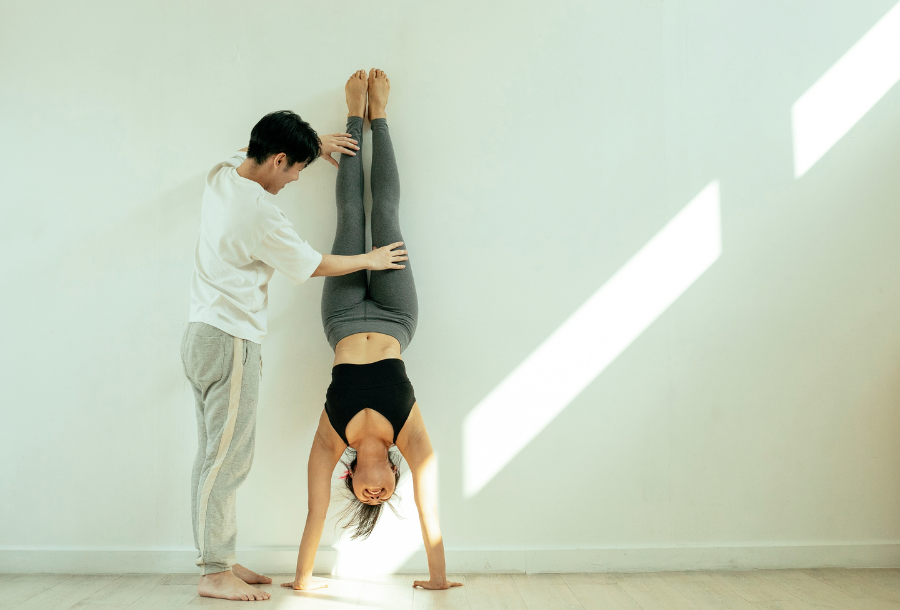
Wall-assisted handstands are an excellent way for beginners to practice and build confidence in their handstand journey. Here’s a step-by-step guide on how to perform wall-assisted handstands effectively:
Preparation:
- Find a Clear Wall:
- Choose a wall with enough space around it so you can kick up against it without obstruction.
- Ensure the wall is free from objects that could interfere with your handstand practice.
- Warm Up:
- Perform a general warm-up to increase blood flow and loosen your muscles. Include dynamic stretches for your wrists, shoulders, and core.
Executing the Wall Assisted Handstand:
- Hand Placement:
- Start by standing facing the wall, about arm’s length away.
- Place your hands on the ground shoulder-width apart, fingers spread wide.
- Ensure your wrists are stacked directly under your shoulders.
- Kick Up:
- Lift one leg (your dominant leg if you have one) and lean forward slightly to start the momentum.
- Kick the lifted leg up towards the wall gently, aiming to bring both legs together.
- Contact with the Wall:
- As your feet come closer to the wall, let them lightly touch or rest against it. Your body should form an L-shape with the wall.
- Alignment and Balance:
- Focus on aligning your wrists, shoulders, and hips vertically.
- Engage your core muscles to maintain stability.
- Keep your arms straight, pressing firmly into the ground to support your weight.
- Look between your hands or slightly forward to maintain balance.
- Adjustments and Stability:
- Once in the handstand position against the wall, experiment with small adjustments in your fingers, palms, and shoulders to find the most stable position.
- Try to hold the position for as long as comfortable, focusing on breathing steadily.
- Exiting Safely:
- To come down, gently bend your knees and lower one leg at a time to return to standing. Use the wall for support if needed.
Tips for Wall Assisted Handstands:
- Start with short holds: Begin with short holds against the wall, gradually increasing the duration as you gain strength and confidence.
- Use a spotter: If possible, have someone spot you initially to help with balance and safety.
- Focus on form: Pay attention to your body alignment and engagement of core and shoulder muscles.
- Practice regularly: Consistent practice will improve your balance and strength over time.
By following these steps and tips, you can effectively use a wall to assist in learning and mastering the handstand, building the foundation for more advanced variations in the future.
3.Balance and Alignment:
Achieving balance and proper alignment is essential for mastering a handstand. Here are some key tips and techniques to help you improve your balance and alignment:
Hand and Arm Positioning:
- Hand Placement:
- Position your hands shoulder-width apart on the ground, fingers spread wide for better stability.
- Ensure your wrists are directly under your shoulders to maintain a strong foundation.
- Arm Engagement:
- Keep your arms straight and actively press into the ground to support your body weight.
- Engage your biceps and triceps to stabilize your elbows.
Core Engagement:
- Core Activation:
- Engage your core muscles (abdominals, obliques, and lower back) throughout the handstand.
- This helps to maintain a straight body line and stabilize your position.
Body Alignment:
- Straight Body Line:
- Aim for a straight line from your wrists to your shoulders, hips, and ankles.
- Avoid arching your back or letting your hips sag towards the ground.
- Keep your head in a neutral position, looking between your hands or slightly forward.
Leg Positioning:
- Leg Alignment:
- Once you kick up into the handstand, bring your legs together and point your toes.
- Keep your legs straight and engaged to maintain balance and alignment.
Balance Techniques:
- Micro-adjustments:
- Use small movements in your fingers, palms, and shoulders to adjust your balance.
- These subtle adjustments help you find and maintain your center of gravity.
- Scissor Technique:
- Practice the scissor technique by gently squeezing your legs together and engaging your inner thighs.
- This helps to control balance and stability in the handstand position.
Drills and Exercises:
- Wall-assisted Handstands:
- Use the wall to practice finding balance and alignment.
- Focus on pressing evenly through your hands and keeping your body aligned while lightly touching the wall for support.
- Freestanding Balancing:
- Once comfortable with wall-assisted handstands, work on balancing without relying on the wall.
- Practice kicking up gently and finding your balance point, using core and arm strength to maintain the position.
Breathing and Focus:
- Breathing:
- Maintain steady, controlled breathing throughout your handstand practice.
- Deep breaths help to calm your mind and body, aiding in balance and focus.
- Focus:
- Concentrate on a fixed point between your hands or slightly forward to help maintain balance and stability.
- Visualize yourself in a straight line from fingertips to toes, reinforcing proper alignment mentally.
Progress Gradually:
- Consistency: Practice regularly to build strength, balance, and confidence in your handstand.
- Incremental Improvement: Set small goals and celebrate progress, such as increasing hold time or refining your alignment.
By focusing on these tips and techniques, you can improve your ability to balance and align your body effectively in a handstand. Patience and persistence are key as you develop the strength and coordination required for this challenging but rewarding skill..
4.Entry Techniques:
Entry techniques are crucial for safely and effectively getting into a handstand. Here are several entry techniques that you can practice as a beginner:
Kick-Up Entry:
- Setup: Start in a standing position facing away from the wall, with your hands placed on the ground shoulder-width apart.
- Execution:
-
- Lean forward slightly and place your dominant leg (usually the stronger or more coordinated leg) forward.
- Bend your other leg and swing it upward towards the wall to generate momentum.
- As your swinging leg reaches its highest point, use it to push off the ground and kick upward towards the handstand position.
- Aim to bring both legs together and extend them fully while maintaining balance against the wall.
- Tips:
-
- Start with gentle kicks to control your momentum.
- Keep your arms straight and press through your shoulders to support your weight.
- Engage your core to maintain stability.
Tuck-Up Entry:
- Setup: Begin in a squat position on the ground, with your hands placed shoulder-width apart in front of you.
- Execution:
-
- From the squat position, lean forward slightly and place your hands firmly on the ground.
- Lift your hips up while simultaneously tucking your knees towards your chest.
- Use the momentum to kick your legs up towards the handstand position.
- Straighten your legs and extend them fully to achieve the handstand against the wall.
- Tips:
-
- Maintain a strong core engagement throughout the movement.
- Practice controlling the momentum generated by the tuck-up movement.
- Focus on keeping your body in a straight line once in the handstand position.
Straddle-Up Entry:
- Setup: Begin in a seated position on the ground, with your legs extended in front of you and your hands placed on the ground beside your hips.
- Execution:
-
- Place your hands firmly on the ground and lean forward slightly.
- Bend your knees and bring them towards your chest while simultaneously spreading your legs apart (into a straddle position).
- Push through your hands and lift your hips upward, kicking your legs up towards the handstand position.
- Once in the handstand position against the wall, bring your legs together to form a straight line.
- Tips:
-
- Maintain balance and control throughout the straddle-up movement.
- Focus on keeping your arms straight and pressing through your shoulders.
- Engage your core muscles to stabilize your body once in the handstand.
Split-Leg Entry:
- Setup: Begin in a lunge position facing away from the wall, with your hands placed on the ground shoulder-width apart.
- Execution:
-
- Place your dominant leg forward and bend your knee slightly.
- Kick your back leg upward towards the handstand position, allowing your dominant leg to follow shortly after.
- Use the momentum from the kick to lift your body into the handstand against the wall.
- Straighten both legs and bring them together to achieve a straight line in the handstand position.
- Tips:
-
- Coordinate the movement of both legs to achieve balance and control.
- Keep your arms strong and your core engaged throughout the split-leg entry.
- Practice adjusting your balance against the wall once in the handstand position.
Tips for Practicing Entry Techniques:
- Start with Wall Support: Initially, practice these entry techniques with the support of a wall to assist in achieving and maintaining the handstand position.
- Focus on Technique: Pay attention to your body alignment, hand placement, and core engagement during each entry technique.
- Gradually Increase Difficulty: As you become more comfortable, work towards performing these entry techniques without relying heavily on the wall for support.
- Safety First: Always practice in a clear, open space and consider having a spotter or instructor to assist with learning the entry techniques safely.
By practicing these entry techniques regularly and focusing on proper technique and safety, you can develop the skills and confidence needed to perform a handstand effectively as a beginner.
5.Practice Regularly:
Practicing regularly is essential for mastering any skill, including learning to do a handstand. Here are some tips on how to approach regular practice effectively:
Set Realistic Goals:
- Short-term Goals: Start with achievable milestones, such as practicing 10 minutes a day, three times a week.
- Long-term Goals: Aim to improve your balance, increase hold time, or achieve a freestanding handstand over several months.
Establish a Routine:
- Consistency: Schedule regular practice sessions into your weekly routine.
- Frequency: Aim for 3-5 sessions per week, depending on your fitness level and schedule.
Warm-Up and Cool Down:
- Warm-Up: Prioritize warming up your wrists, shoulders, core, and legs with dynamic stretches and movements.
- Cool Down: Include gentle stretches to relax and lengthen muscles after practice to prevent stiffness.
Progressive Learning:
- Start with Basics: Begin with wall-assisted handstands to build strength, confidence, and proper alignment.
- Gradual Challenges: Progress to practicing away from the wall, focusing on balance and stability.
Focus on Technique:
- Quality Over Quantity: Pay attention to your form, alignment, and muscle engagement during each practice.
- Feedback: Use mirrors or record videos to review and adjust your technique.
Vary Your Practice:
- Entry Techniques: Rotate through different entry methods (kick-up, tuck-up, etc.) to develop versatility.
- Drills: Incorporate drills for balance, core strength, and shoulder stability specific to handstands.
Rest and Recovery:
- Listen to Your Body: Take breaks as needed during practice to prevent overexertion and injury.
- Recovery: Ensure adequate sleep, hydration, and nutrition to support muscle recovery and growth.
Seek Guidance:
- Instructor or Coach: Consider taking classes or private sessions with a qualified instructor to receive personalized feedback and guidance.
- Community Support: Join online forums, workshops, or local meetups to connect with others learning handstands for motivation and tips.
Stay Positive and Patient:
- Celebrate Progress: Acknowledge improvements in strength, balance, and technique, no matter how small.
- Patience: Learning a handstand takes time and persistence; trust in the process and enjoy the journey.
Safety First:
- Practice Environment: Choose a safe, clear space with a supportive surface (such as a yoga mat) free from obstacles.
- Spotter: When practicing away from the wall or attempting new techniques, have a spotter to assist and ensure safety.
By incorporating these practices into your routine, you’ll create a structured approach to improving your handstand skills steadily and safely. Remember, consistency and dedication are key to achieving your goals in handstand practice.
6.Safety Precautions to learn how to do a handstand for beginners:
Practicing handstands can be exhilarating and rewarding, but it’s crucial to prioritize safety to prevent injuries. Here are some essential safety precautions to keep in mind:
Warm-Up Properly:
- Dynamic Warm-Up: Begin with a thorough warm-up to increase blood flow and prepare your muscles for the physical demands of handstands.
- Focus Areas: Pay particular attention to warming up your wrists, shoulders, core, and legs with dynamic stretches and movements.
Progress Gradually:
- Start with Basics: Begin practicing handstands against a wall or with a spotter before attempting freestanding handstands.
- Incremental Steps: Gradually increase the difficulty and duration of your practice sessions as your strength and technique improve.
Use Proper Technique:
- Hand Position: Ensure your hands are placed shoulder-width apart on a stable surface, with fingers spread wide for better balance and support.
- Core Engagement: Keep your core muscles engaged throughout the handstand to maintain stability and control.
- Alignment: Focus on maintaining a straight line from your wrists to your shoulders, hips, and ankles to reduce strain on your body.
Practice with a Spotter:
- Safety Assistance: Have a trained spotter or instructor present, especially when attempting new techniques or practicing away from a wall.
- Assistance: A spotter can provide guidance, support, and help prevent falls by gently assisting your legs or body if you lose balance.
Choose a Safe Environment:
- Clear Space: Practice in a clear, open area free from obstacles, furniture, or walls that could cause injury if you fall.
- Surface: Use a non-slippery surface such as a yoga mat or padded floor to cushion your landing and provide traction.
Listen to Your Body:
- Fatigue and Rest: Take breaks during practice sessions to prevent muscle fatigue and maintain focus.
- Pain Signals: Stop immediately if you experience pain in your wrists, shoulders, or any other part of your body. Continuing through pain can lead to injury.
Fall Safely:
- Training for Falls: Practice falling safely by tucking your chin, rolling onto your back, or coming down to your feet if you lose balance.
- Avoiding Injury: Learning how to fall properly can minimize the risk of injury if you lose control during a handstand.
Stay Hydrated and Rested:
- Hydration: Drink plenty of water before and after practice to stay hydrated, which supports muscle function and recovery.
- Rest: Allow adequate time for rest and recovery between practice sessions to prevent overuse injuries and promote muscle repair.
Seek Professional Guidance:
- Instructor or Coach: Consider taking classes or private sessions with a qualified instructor who can provide personalized feedback and guidance.
- Online Resources: Use reputable online tutorials and resources to supplement your learning, but prioritize in-person instruction for safety-critical techniques.
Stay Positive and Patient:
- Mindset: Approach handstand practice with a positive attitude and patience. Mastery takes time, and setbacks are natural parts of the learning process.
- Celebrate Progress: Acknowledge and celebrate your achievements, no matter how small, to stay motivated and encouraged in your practice.
By prioritizing safety precautions and practicing mindfully, you can enjoy the journey of learning handstands while minimizing the risk of injury. Always listen to your body and seek guidance from qualified professionals to ensure a safe and rewarding practice experience.
7.Progress Gradually:
Progressing gradually is key to safely and effectively learning and mastering handstands. Here are important steps and tips for progressing in your handstand practice:
Master the Basics:
- Wall-Assisted Handstands: Begin by practicing handstands with the support of a wall. This helps you develop strength, balance, and confidence.
- Focus on Form: Pay attention to your hand placement, core engagement, and body alignment (straight line from wrists to ankles).
Increase Hold Time:
- Set Goals: Start with short holds (e.g., 5-10 seconds) and gradually increase the duration as you build strength and stability.
- Consistency: Practice regularly to reinforce muscle memory and improve endurance.
Work on Entry Techniques:
- Variety: Experiment with different entry methods such as kick-ups, tuck-ups, straddle-ups, and split-leg entries.
- Skill Development: Focus on refining your technique and becoming comfortable with each entry method before progressing to more challenging variations.
Move Away from the Wall:
- Freestanding Practice: Once you feel confident with wall-assisted handstands, start practicing away from the wall.
- Spotter Assistance: Have a spotter or instructor nearby for safety and guidance as you transition to freestanding handstands.
Focus on Balance and Control:
- Drills: Incorporate balance drills such as shifting weight from one hand to the other, scissor kicks, or pike presses to improve control.
- Mindful Practice: Concentrate on maintaining a stable core and making small adjustments to stay balanced.
Build Strength and Flexibility:
- Strength Training: Include exercises that target your shoulders, arms, core, and wrists to support the demands of handstands.
- Flexibility: Stretch regularly, especially focusing on wrists, shoulders, hip flexors, and hamstrings to improve range of motion and prevent injury.
Practice Safe Falling:
- Safety Precautions: Learn how to safely exit a handstand by tucking your chin, rolling onto your back, or coming down to your feet if you lose balance.
- Fall Drills: Practice falling techniques to build confidence and reduce fear of falling.
Seek Guidance and Feedback:
- Instructor Support: Consider taking classes or private sessions with a qualified instructor who can provide personalized feedback and corrections.
- Video Analysis: Record your practice sessions to review your form and identify areas for improvement.
Be Patient and Persistent:
- Mindset: Embrace the learning process and understand that progress takes time. Stay patient and persistent in your practice.
- Celebrate Achievements: Celebrate milestones and improvements, no matter how small, to stay motivated and encouraged.
Listen to Your Body:
- Rest and Recovery: Allow adequate time for rest between practice sessions to prevent overuse injuries and promote muscle recovery.
- Avoid Overexertion: If you experience pain or discomfort, take a break and consult a healthcare professional if needed.
By progressing gradually and focusing on proper technique, balance, and safety, you can effectively develop your handstand skills over time. Consistent practice, patience, and a mindful approach will help you achieve your goals while minimizing the risk of injury.
Remember, progress in learning a handstand varies from person to person. Stay patient, stay consistent, and celebrate each improvement along the way!