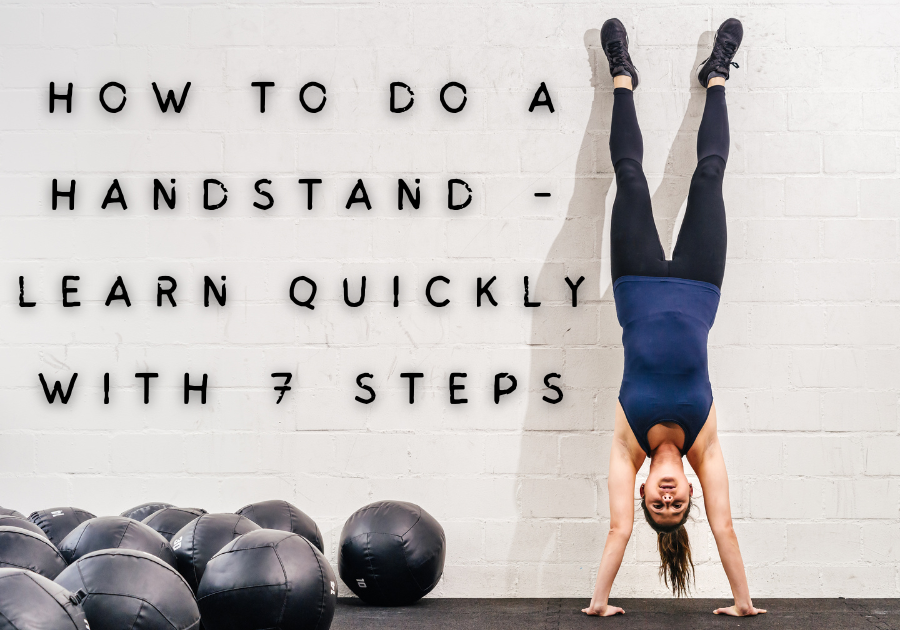
Ready to learn how to do a handstand? Whether you’re new to this or have some experience, mastering the handstand is about strength and balance. It feels amazing to hold yourself up with just your hands!
In this guide, we’ll go through each step so you can build confidence. We’ll start with warming up your body and getting comfortable with being upside down. You’ll learn how to position your body for stability, use your core muscles to stay balanced, and find the right place for your hands to support you.
We’ll also talk about staying focused and not giving up when it gets tough. Whether your goal is to do a handstand on the beach or just to challenge yourself, this guide will help you step by step. Get ready to enjoy the journey of learning how to do a handstand!
Step 1: Warm-up

Step 2: Hand Placement

Proper hand placement is crucial for achieving and maintaining balance during a handstand. Follow these steps to ensure correct hand positioning:
- Positioning: Begin in a kneeling position with your hands placed shoulder-width apart on the ground. Your fingers should be spread wide for better stability.
- Alignment: Ensure your wrists are directly under your shoulders. This alignment provides a solid foundation and prevents unnecessary strain on your wrists.
- Grip: Grip the ground with your fingertips and the base of your palms. Distribute your weight evenly across your hands to maintain control.
- Finger Pressure: Press firmly into the ground with your fingers, especially the index finger and thumb. This helps to stabilize your handstand and prevent your wrists from collapsing.
- Engagement: Engage your forearm muscles by pressing through your palms and lifting your shoulders slightly away from the ground. This engagement supports your body weight and promotes balance.
- Practice: Practice holding this position for short durations, gradually increasing the time as your strength and confidence improve.
Remember, hand placement plays a significant role in your ability to perform a stable handstand. Take your time to adjust and refine your hand position until it feels comfortable and supportive. In the next steps, we’ll build on this foundation to progress towards a full handstand.
Step 3: Kick-up Preparation
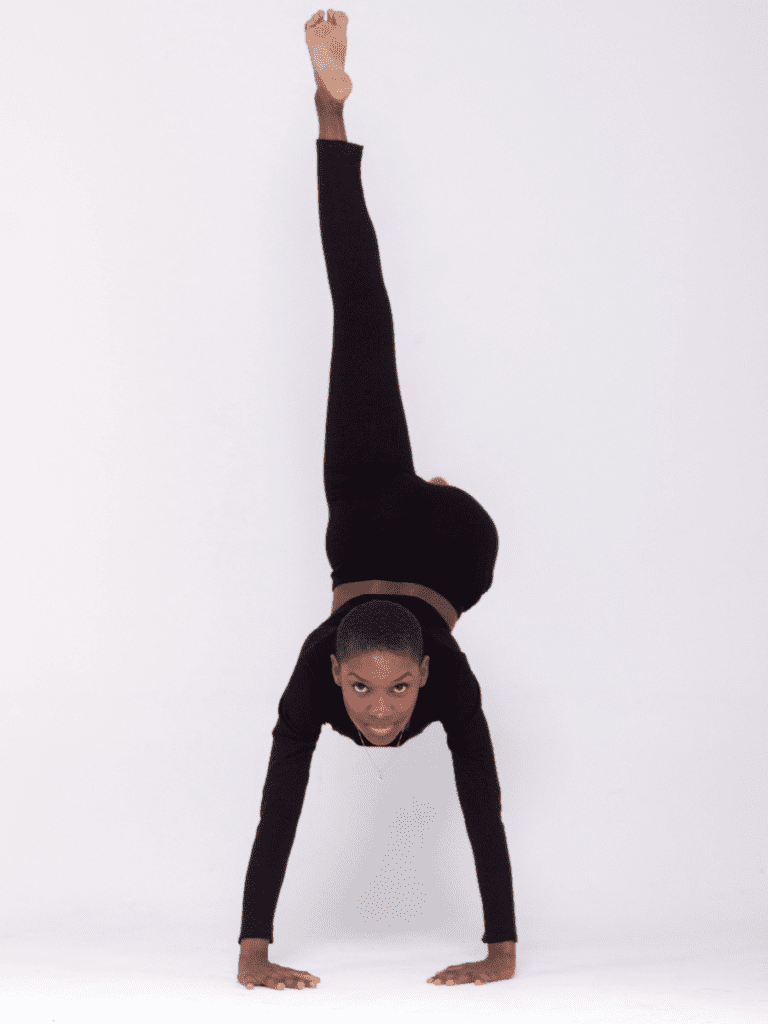
Before attempting to kick up into a handstand, it’s essential to prepare your body and mind for the movement. Follow these steps to get ready:
- Positioning: Start in a kneeling position with your hands placed shoulder-width apart on the ground, following the hand placement guidelines from Step 2.
- Distance: Position your hands close enough to a wall that you can comfortably reach it with your feet during the kick-up phase. The wall will provide support and help you practice alignment.
- Visualize: Visualize the movement and imagine yourself kicking up smoothly into a handstand. This mental preparation can boost your confidence and focus.
- Leg Position: Lift one leg (your dominant leg if you have one) and position it closer to your hands. This leg will drive the kick-up motion.
- Kick-up: With a gentle kick of your back leg, start to lift your dominant leg towards the wall. Aim for a controlled movement rather than a forceful kick.
- Use the Wall: As your dominant leg reaches the wall, lightly tap it to establish balance and stability. Your body should form a straight line from hands to feet against the wall.
- Hold and Adjust: Once in position against the wall, hold the handstand briefly to get a feel for balance and alignment. Adjust your body as needed to find the optimal position.
- Exit Safely: When you’re ready to come down, gently lower one leg at a time to return to the starting kneeling position.
Practice this kick-up preparation regularly to build strength, balance, and confidence in approaching the handstand. Over time, you’ll feel more comfortable with the kick-up motion and can gradually reduce reliance on the wall for support.
Step 4: Kick-up
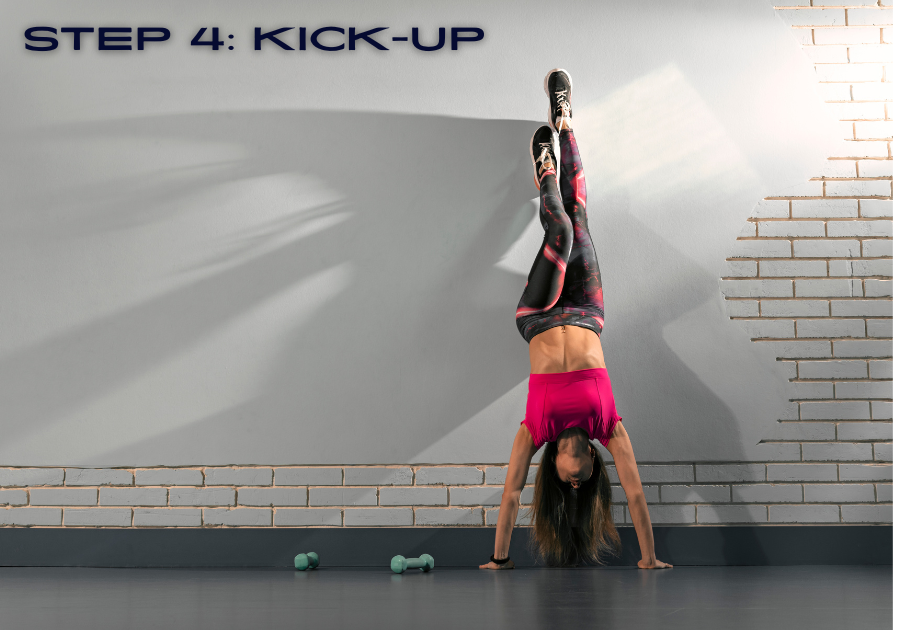
Now that you’ve prepared with the positioning and kick-up preparation, let’s move on to kicking up into a handstand:
- Starting Position: Begin in a kneeling position with your hands placed shoulder-width apart on the ground, close to a wall for support if needed.
- Leg Position: Lift one leg (your dominant leg if possible) and position it closer to your hands. This leg will initiate the kick-up.
- Kick: With a controlled kick of your back leg, simultaneously start to push through your hands and shoulders. The momentum from the kick should propel your dominant leg upward.
- Follow Through: As your dominant leg rises, continue to push through your hands and engage your core to lift your hips up and over your shoulders.
- Alignment: Aim to extend your legs fully overhead, stacking your hips over your shoulders and your heels over your hips. Your body should form a straight line from hands to feet.
- Balance: Focus on finding balance by actively pressing through your fingertips and maintaining a strong core engagement. Use micro-adjustments in your fingers and wrists to stabilize.
- Hold: Once in a balanced position, hold the handstand for as long as comfortable, aiming to maintain control and stability.
- Exit Safely: When you’re ready to come down, gently lower one leg at a time to return to the starting kneeling position.
Remember, learning to kick up into a handstand takes practice and patience. Start with small kicks and gradually increase the height and control as you gain confidence. Use the wall for support as needed, and focus on maintaining alignment and balance throughout the movement.
Step 5: Finding Balance
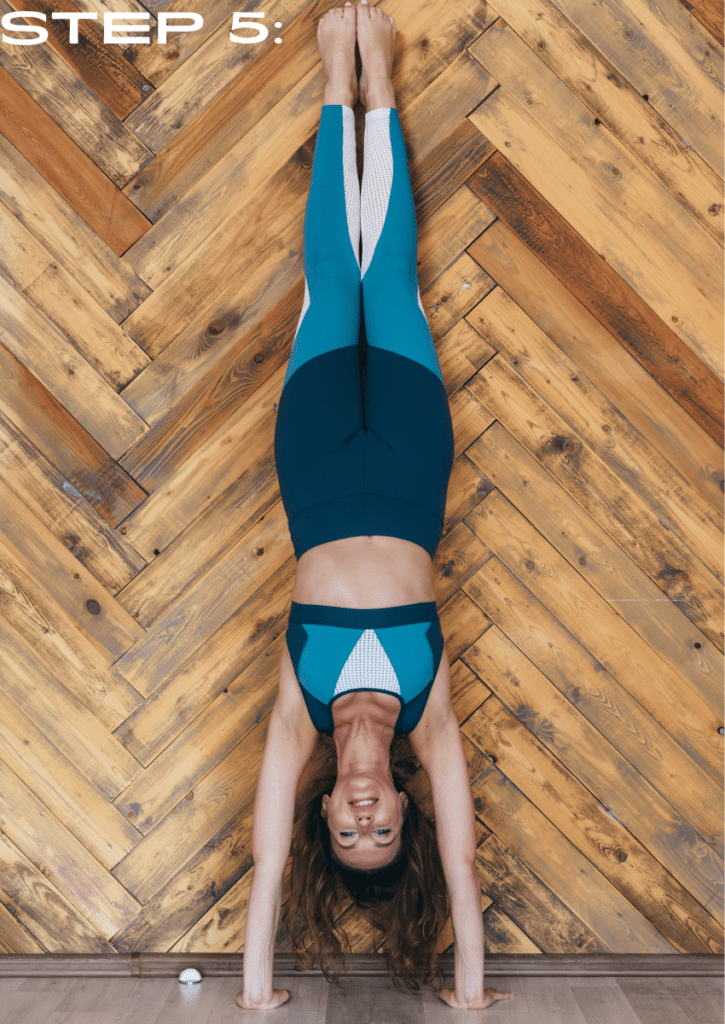
Once you’ve kicked up into a handstand, the key is to find and maintain balance. Follow these steps to stabilize your handstand:
- Alignment: Ensure your body is aligned properly. Your wrists should be under your shoulders, arms straight, and fingers spread wide for a solid base.
- Core Engagement: Activate your core muscles by pulling your belly button towards your spine. This helps to stabilize your body and prevent over-arching in your lower back.
- Leg Positioning: Keep your legs straight and together, toes pointed upwards. This alignment helps to streamline your body and maintain balance.
- Visual Focus: Fix your gaze on a point between your hands or slightly in front of them. This focal point helps to steady your balance and keep your head in a neutral position.
- Weight Distribution: Adjust the distribution of your weight between your hands and fingers. Press firmly through your palms and fingertips to control your balance.
- Micro-adjustments: Make small adjustments in your fingers, wrists, and core muscles to fine-tune your balance. Use these subtle movements to counterbalance any shifts in weight.
- Breathing: Maintain steady and controlled breathing. Avoid holding your breath, as it can tense your muscles and affect your balance.
- Practice: Balance in a handstand improves with practice. Start with shorter holds and gradually increase the duration as you build strength and confidence.
- Exit Safely: When you’re ready to come down, lower one leg at a time with control to avoid losing balance.
Finding balance in a handstand requires concentration, body awareness, and consistent practice. Focus on these steps to improve your stability and enjoy the feeling of being upside down!
Step 6: Holding the Handstand
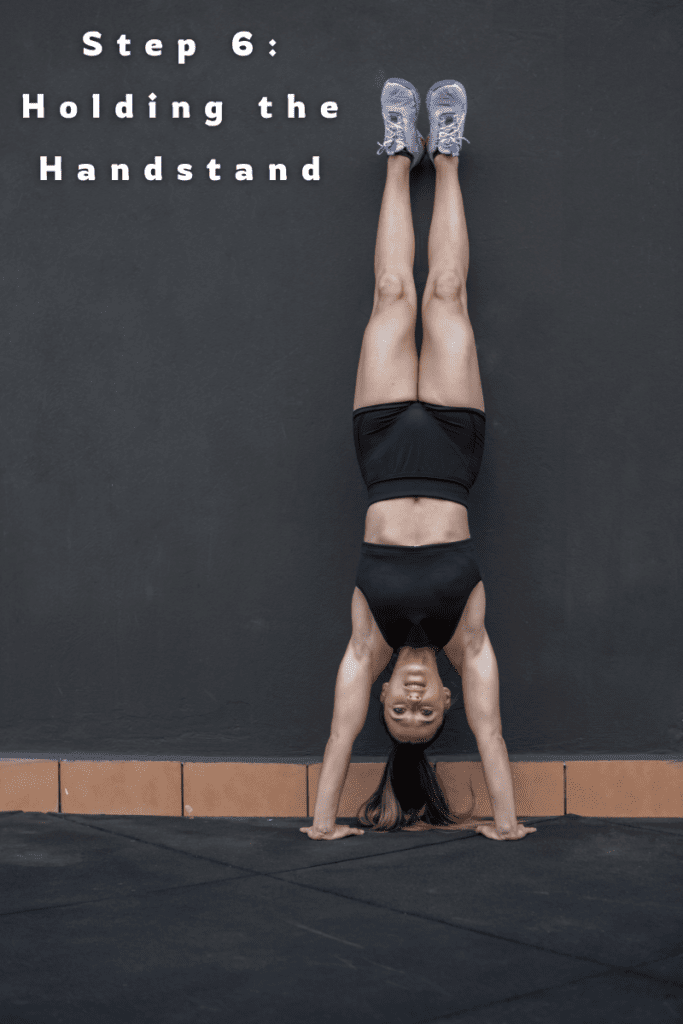
Once you’ve kicked up and found your balance in a handstand, the next step is to work on holding the position steadily. Follow these tips to maintain your handstand:
- Steady Alignment: Ensure your body remains in a straight line from your wrists to your ankles. Avoid arching or rounding your back excessively.
- Core Strength: Keep your core muscles engaged throughout the hold. This stability is crucial for maintaining balance and control.
- Gaze: Maintain a focused gaze on a fixed point. This helps to stabilize your body and prevent unnecessary movement.
- Breathing: Breathe steadily and rhythmically. Avoid holding your breath, as it can cause tension in your muscles and affect your balance.
- Weight Distribution: Continue to press through your palms and fingertips to distribute your weight evenly. This helps to prevent your hands from slipping and supports your balance.
- Micro-adjustments: Use subtle adjustments in your fingers, wrists, and core muscles to fine-tune your balance. These small movements help you maintain stability against minor shifts.
- Mindfulness: Stay present and aware of your body position. Focus on maintaining a calm and controlled mindset to sustain the handstand.
- Practice Holds: Start with shorter holds and gradually increase the duration as you build strength and confidence. Aim for consistency in your practice to improve your endurance over time.
- Exit Safely: When you’re ready to come down, lower one leg at a time with control to avoid losing balance abruptly.
Holding a handstand requires patience, practice, and attention to detail. By focusing on these tips and maintaining a regular practice routine, you’ll strengthen your ability to hold a handstand steadily and confidently.
Step 7: Coming Down
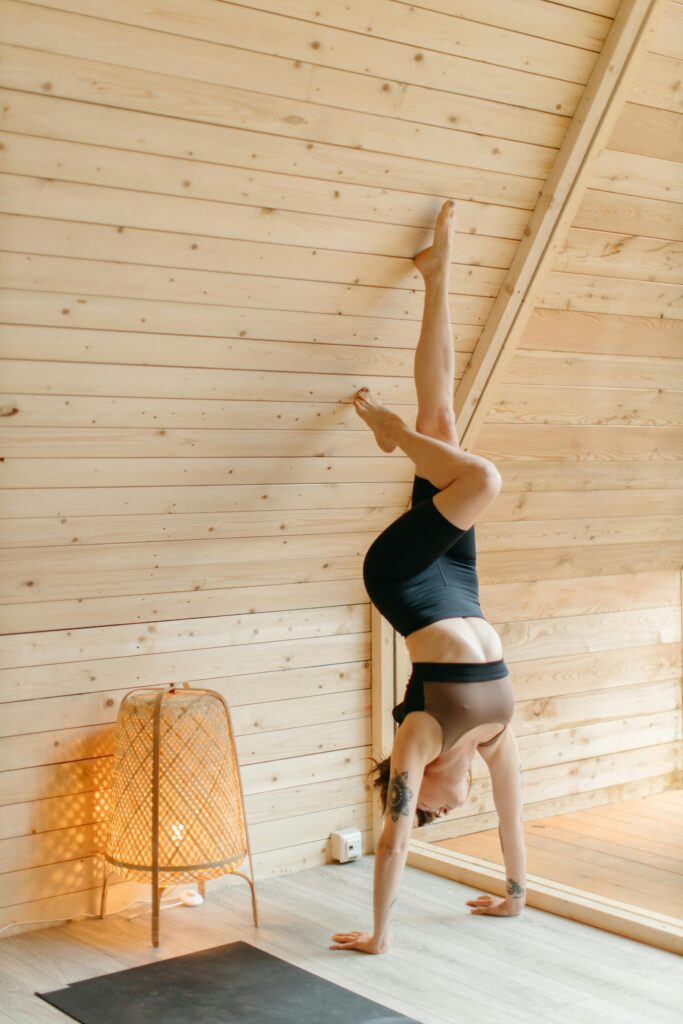
After holding your handstand, it’s important to exit safely to avoid injury. Follow these steps to come down gracefully:
- Prepare for Descent: As you feel ready to come down, begin by slowly lowering one leg towards the ground. This leg will act as a counterbalance to help control your descent.
- Controlled Movement: Lower your leg with control, maintaining awareness of your body position and balance. Avoid sudden movements that can throw off your stability.
- Land Softly: As your first leg touches the ground, gently lower the other leg to join it. Aim to land softly with both feet planted firmly on the ground.
- Bend Your Knees: To absorb the impact of landing, bend your knees slightly as your feet make contact with the ground. This reduces strain on your joints.
- Maintain Alignment: Throughout the descent, keep your core engaged and maintain a straight posture to ensure stability.
- Practice Exiting: Practice this descent technique regularly to become comfortable and confident in safely coming down from a handstand.
Remember, safety is paramount when practicing handstands. Focus on maintaining control and awareness of your body throughout the entire movement, from kick-up to descent. With consistent practice and attention to technique, you’ll improve your handstand skills and reduce the risk of injury.
Tips for Success:
- Consistent Practice: Dedicate regular practice sessions to build strength, balance, and familiarity with the handstand. Practice in a safe environment with proper supervision if needed.
- Patience and Persistence: Learning to handstand takes time and effort. Be patient with yourself and celebrate small improvements along the way.
- Focus on Form: Pay attention to proper form and alignment from the beginning. This includes hand placement, core engagement, and leg positioning.
- Use Props: Utilize a wall or a spotter to assist with balance and build confidence. Gradually reduce reliance on support as you gain proficiency.
- Warm-Up and Cool Down: Always warm up your muscles before attempting handstands to prevent injuries. Incorporate stretching and cooldown exercises to maintain flexibility and recovery.
- Build Strength: Strengthen your shoulders, core, and wrists through targeted exercises such as planks, shoulder presses, and wrist mobility drills. This foundational strength supports your handstand practice.
- Breathing and Relaxation: Practice steady breathing to stay calm and focused while upside down. Relax your facial muscles and avoid unnecessary tension in your body.
- Visualize Success: Visualize yourself successfully performing a handstand. Positive visualization can enhance your confidence and mental preparation.
- Seek Guidance: Consider taking classes or workshops with experienced instructors who can provide personalized feedback and guidance.
- Stay Positive: Embrace the challenge of learning a new skill and maintain a positive mindset. Celebrate your progress and stay motivated throughout your journey.
- With perseverance and practice, you can master the handstand and enjoy the benefits of improved balance and body control
Conclusion
In short, mastering the handstand requires dedication, patience, and consistent practice. Celebrate progress, learn from setbacks, and enjoy the journey of defying gravity with each successful attempt. Keep refining your technique, building strength, and nurturing your mind-body connection. Stay committed, stay positive, and embrace the challenge of achieving and surpassing your handstand goals. Happy handstanding!


